Cabinet hardware installation is one of those jobs that looks like a five-minute task and turns into a two-hundred-dollar mistake. You mark the first pull by eye, drill it, step back, and the handle sits a quarter inch lower than the one on the next door. Hang twelve of them that way and the kitchen looks like it was assembled by somebody in a hurry, because it was.
I have hung a lot of cabinet hardware in twenty-two years of general contracting around Cleveland: kitchens, bath vanities, shop cabinets, and a run of built-ins in a Lakewood bungalow where the homeowner had already drilled two sets of holes into a ninety-dollar door before she called me. The hardware is almost never the problem. The holes are the problem.
The method that fixes it is boring and it works. Decide your spacing once, punch the mark so the bit cannot wander, clamp a jig so door fourteen is identical to door one, and set the clutch on the drill so you stop before you strip a screw head on a finished face. That is the whole job. The rest of this article is how to do it in the right order.
Why you should trust me
I ran my own general contracting crew in Cleveland for twenty-two years. Decks, basements, kitchens, the whole rusty Midwest menu. In that time I burned out more drills than most people will ever own, and every one of them ended up on the graveyard wall in my shop: screwguns with melted brushes, a hammer drill that caught fire mid-pour, an impact driver that stripped its own anvil. There are more than thirty tools up there now.
The wall started as a joke and turned into the most honest review system I know, because nothing gets on it without earning its death. When I recommend a tool for a job, it is because I know what that job actually does to a tool. Cabinet hardware is a precision job, not a power job, and that changes what you should be shopping for.
How I picked and how I tested
Two categories of tool matter here, and I hold both to the same standard I hold everything on my truck to.
For a drill, the questions are simple. Does the chuck still bite after a couple hundred bit changes? Can I still buy batteries and parts for the platform in five years? Does it feel the same at screw fifty as it did at screw five? Spec sheet torque is measured on a warm battery with a fresh charge, and it means nothing on a Tuesday morning in a cold garage. What matters for cabinet hardware is control: a light body, a chuck that holds a small bit straight, and an adjustable clutch you can dial down so you never bury a screw head in a painted door.
For a jig, the questions are whether it holds its setting, whether it sits still on a finished face without walking, and whether the spacing it offers matches the hardware people actually buy. A jig that only does one spacing is a jig that gets returned.
Neither of these picks came off a spec sheet. The drill is a homeowner-class tool and I will say that out loud rather than dress it up. The jig is a one-job tool for most people, and it earns its place in the drawer anyway. Both fit this job for the same reason: the job rewards precision, not brute force.
What you need before you start
You do not need much. A drill, the right bit, the hardware you already bought, a jig to keep the holes in the same place, a center punch, a tape measure, painter's tape, a pencil, and a scrap of the same material as your door fronts so you can ruin the scrap instead of the door.
That last item is the one people skip, and it is the one that saves cabinets.
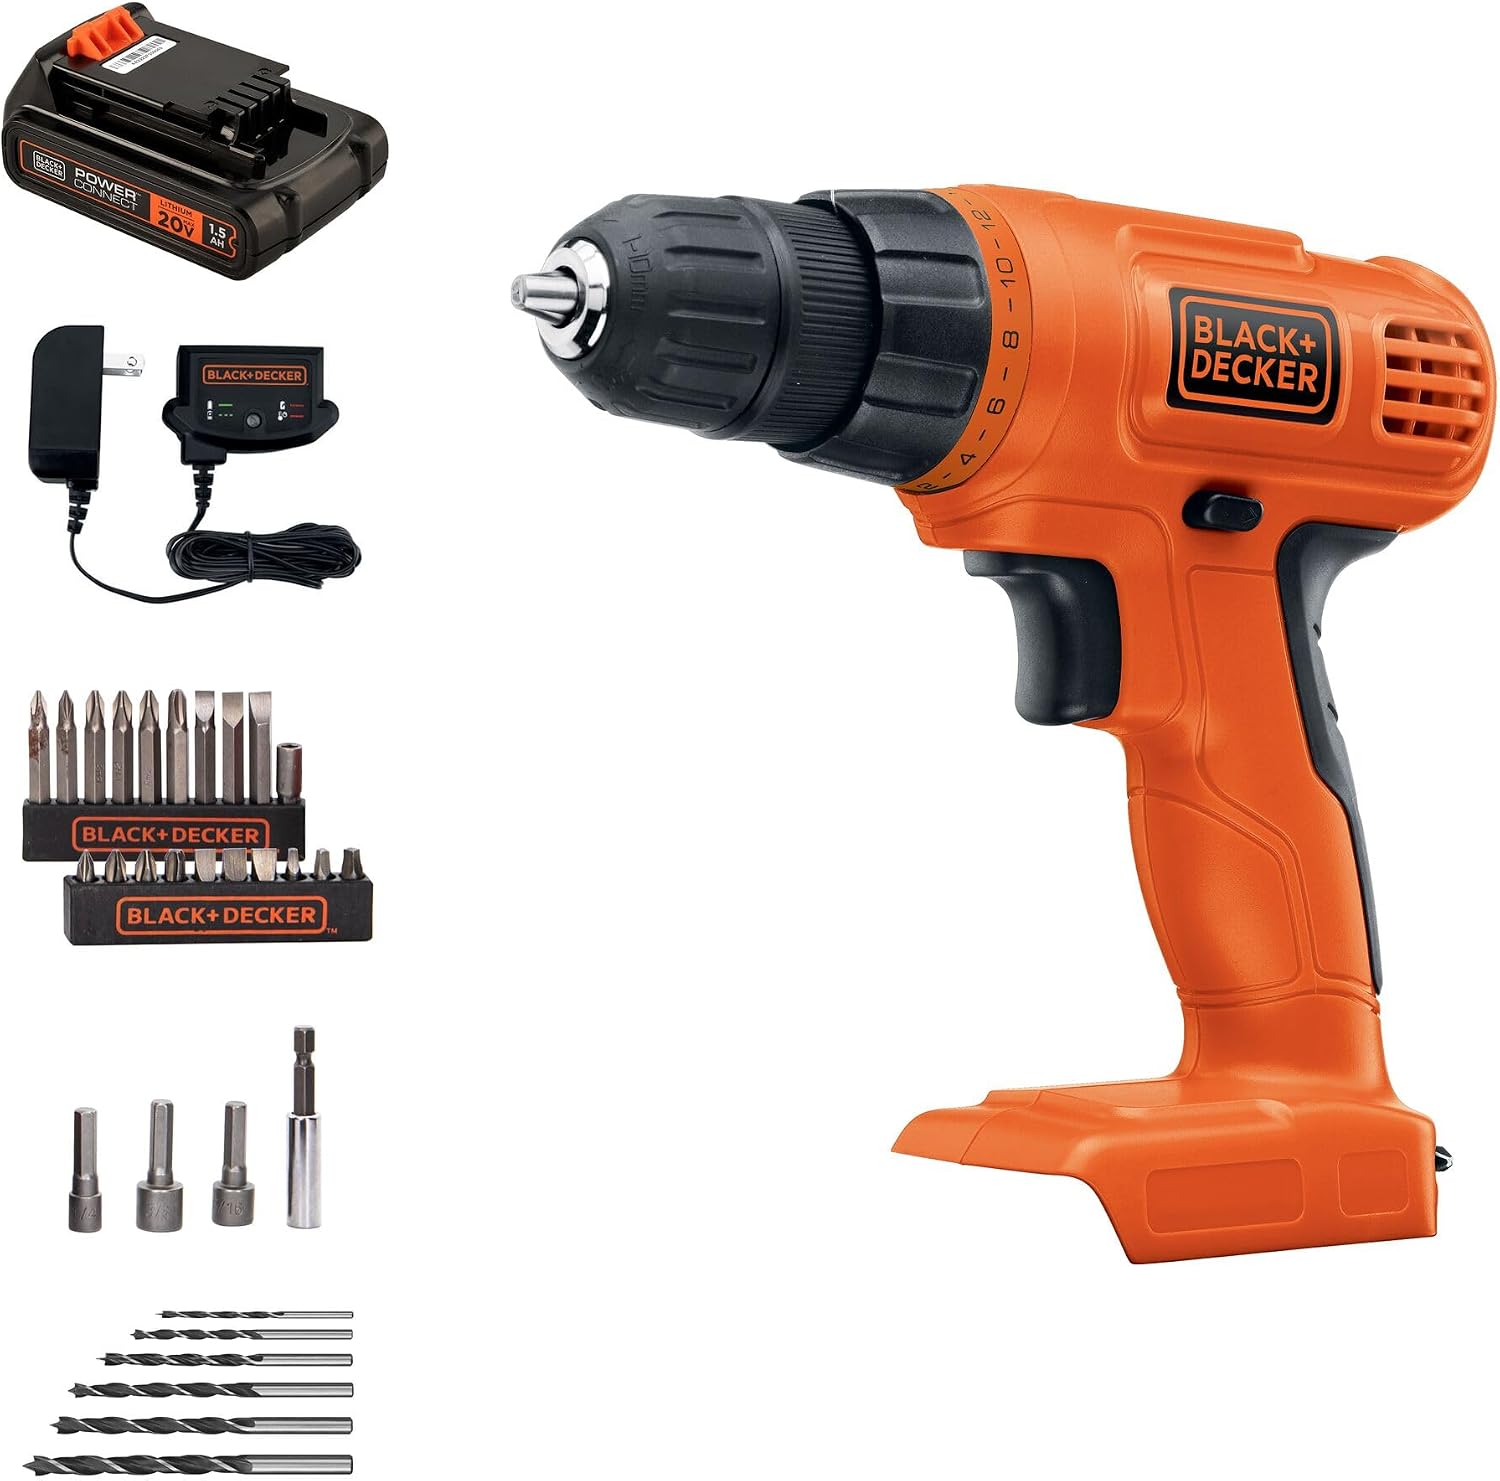
Our pick: BLACK+DECKER 20V MAX POWERCONNECT Power Drill Cordless Drill Driver Electric Screwdriver with 30 Piece Bit Set, Battery and Charger Included (LD120VA)
 Visit on Amazon →
This is the drill I would hand a homeowner who is about to hang twenty-two handles and does not own a drill yet. It arrives as a complete kit: the drill, a 30-piece bit set, a battery, and a charger, so the whole job comes out of one box with nothing else to buy on a Saturday morning.
For cabinet work you do not need a heavy hammer drill or a monster impact driver. You need a light tool that spins a small pilot bit at a controllable speed and has an adjustable clutch you can set low enough that the screw seats and stops instead of tearing through a finished face. That is the feature that matters here, more than any torque number on the box. The clutch is also what keeps you from driving a pull screw straight through a thin drawer front, which is a mistake you only make once.
The POWERCONNECT 20V MAX battery is a platform, which means the same pack runs the rest of that line if you add a sander or a trim saw later. That is the part of a drill purchase people forget: you are not buying a drill, you are buying into a battery family for the next several years. Check what else runs on the pack before you commit.
Flaws but not dealbreakers: This is a homeowner-class drill, not a pro tool, and I am not going to pretend otherwise. If you hang cabinets for a living, you want brushless and a bigger battery platform, because a brushed motor in daily production work is a tool with a countdown clock on it. For a kitchen's worth of hardware once or twice a decade, this is more than enough tool, and the included bit set covers the small bits you need for pilot holes and screw heads.
Anyone finishing their own kitchen, a bathroom vanity, or a shop full of storage cabinets will be fine here. If your job is three kitchens a month, keep reading and then buy a brushless drill instead.
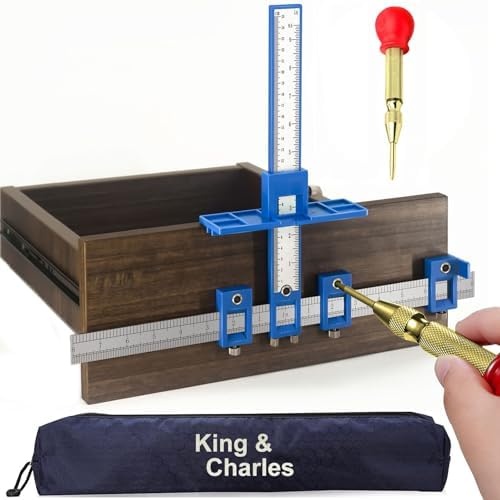
The repeatability pick: King&Charles Cabinet Hardware Jig & Automatic Center Punch Set.
 Visit on Amazon →
A cabinet hardware jig is the difference between measuring and repeating. Measuring is what you do on door one. Repeating is what gets you through door twenty-two without a single handle sitting crooked, and a jig is how you repeat. This set pairs the jig with an automatic center punch, which is the second half of the same job.
The punch matters more than people expect. A pencil mark is a suggestion to a drill bit, and a small bit on a slick painted face will follow the suggestion right off the mark and skate across the door. A punched dimple gives the bit a starter hole it cannot escape. On a finished door front, that dimple is the difference between a clean hole and a scar you have to fill and repaint.
Flaws but not dealbreakers: Before you buy any jig, measure the center-to-center spacing your pulls actually need. Pulls come in several common spacings, and if your hardware does not match what the jig was built to do, you will end up marking by hand and the whole point is gone. Measure your hardware first, then confirm the jig covers it. Also, a jig is a one-job tool for most people. It lives in a drawer until the next kitchen, and that is fine, because it costs less than one replacement cabinet door.
Anyone hanging more than four pieces of hardware should own one. If you are hanging two knobs on a bathroom vanity, a tape measure and a steady hand will do.
The actual workflow, step by step
Now the part you came for. Follow this order and you will not drill a hole you regret.
Step one: Decide the layout before anything touches wood. Walk the kitchen with a notepad. Which doors get knobs and which get pulls? Are the pulls vertical or horizontal? Do the drawers get one pull or two? Every one of those decisions changes the hole positions, and changing your mind after the first hole is drilled means filling and repainting.
Step two: Measure the hardware, not the door. Pull the actual handle out of the bag and measure the center-to-center distance between its mounting holes. That number drives everything. Most pulls ship with a paper template that shows it, and the template is worth reading even if you own a jig, because it tells you the screw size too.
Step three: Pick one number and write it down. For drawer fronts, the pull is centered horizontally, and the vertical position is whatever looks right on your drawer height. For doors, most cabinet makers land somewhere between two and a half and four inches in from the edge on the hinge side, and the pull sits on the side opposite the hinge. Pick a number, write it on a scrap of paper, and tape that paper to the counter. Every door uses the same number. This single habit is what separates a kitchen that looks built from a kitchen that looks assembled.
Step four: Drill a test hole in scrap. Use the same thickness material as your door fronts. Drill the pilot hole with the bit you plan to use, then drive the screw. If the screw splits the scrap, go up a bit size. If it spins without biting, go down. Two minutes on scrap beats an hour of repair.
Step five: Clamp the jig and punch the mark. Set the jig to your spacing, hold it against the door or drawer front, and clamp or index it so it cannot shift. Mark both hole positions with the center punch. Check the spacing with a tape before you drill. If the two dimples are not the same distance apart as your hardware, something moved and you need to fix it now, not after the bit goes in.
Step six: Set the clutch low and drill. Set the drill clutch to a low setting, keep the bit straight, and let the bit cut at its own pace. Pushing hard is how you blow out the back of a door. If your door front is thin or you are drilling all the way through, back the exit side with a scrap block so the bit exits into scrap instead of tearing out the face.
Step seven: Attach the hardware. Drive the screws with the clutch set low, or finish them by hand with a screwdriver. Snug is the goal. A screw that is tight enough to hold a pull is nowhere near tight enough to strip, and gorilla-tight on a cabinet screw is how you crack a door face or strip a screw head you then have to dig out.
Step eight: Check door one against door two before you do the rest. Hang the first two, stand back, and look at them side by side. If they match, keep going with the jig at the same setting. If they do not, you have found the problem on door two instead of door twenty.
The mistakes that cost you a cabinet door
Drilling from the front with no backer block, then wondering why the exit hole blew out. Using the wrong bit size because you did not test on scrap. Measuring every door individually instead of setting the jig once and repeating. Over-tightening screws on a painted face. Drilling a drawer front for two pulls without checking that the holes clear the drawer box and the slides behind it. Marking with a pencil and watching the bit walk off the mark.
Every one of those has the same root cause: doing the layout and the drilling in the same motion. Separate them. Decide everything, mark everything, and only then pick up the drill.
Why a paper template loses to a jig
Paper templates are free and they work exactly once. Tape them down, drill through them, and the template is now a holey sheet of paper that shifts on the second door. By door six you are holding it with one hand and drilling with the other, and that is when the holes drift.
A jig does the same job with a body that holds its setting and a face that sits flat on the door. The difference shows up around door eight, which is about when a homeowner's patience runs out and the paper template starts moving. If you are hanging four handles, use the paper. If you are hanging twenty, the jig is the cheaper tool.
What this all costs
Two purchases do the whole job: a drill kit and a jig. Check current Amazon price on both and do the math against the alternative, which is one ruined cabinet door plus the paint and time to fix it. On a painted door you are looking at filling, sanding, priming, and repainting a face, and the color will never quite match the factory finish.
Spread either tool over the years you will own it and the number gets small fast. A drill kit covers pilot holes, hardware screws, and about four hundred other jobs around the house. A jig covers this job, and the next kitchen, and the shop cabinets you have been meaning to build.
The tools are the easy part. The order of operations is what keeps your kitchen looking like a cabinetmaker hung the hardware, and that part is free. Decide the layout, measure the hardware, punch the mark, set the clutch low, and repeat with the jig until the last door matches the first one.
That is the job. Slow hands, fast work.